All About The Lost City Trek In Colombia
The Lost City trek is a bucket list jungle hike in Colombia where you can see the ruins of the Ciudad Perdida, an ancient city built by the Tairona people more than 1,000 years ago.
This is a guided trek that normally takes 4 days, and there’s plenty of challenge. The trekking packages include lodging, food, and some very knowledgeable, kind, and helpful local guides.
I did the Lost City hike recently and it was a great experience. We had a fun group and we went far into the Sierra Nevada mountains, visited indigenous villages, crossed rivers, swam every day, and hiked till our legs hurt.
In this blog post, I’ll explain everything you need to know about the Lost City trek before you go!
Quick Facts*
- Distance: 49 kilometers (30 mi)
- Elevation Gain: 2,650 meters (8,700 ft)
- Max Altitude: 1,190 meters (3,900 ft)
- Duration: 3 – 5 days
- Difficulty: Hard
*These stats are for the round trip journey

Huts at the indigenous village
How To Get There
The Lost City is located in the mountains near Santa Marta, in northern Colombia.
There are lots of direct flights every day to Santa Marta from airports like Bogota, Medellin, and Pereira, and the flight time is only about 1.5 hours. You can shop for flights on Skyscanner.
The trekking tours include a transfer from Santa Marta to the start of the trail, and then back to town afterwards, so you won’t need to worry about transportation.
If you’re looking for a place to stay in Santa Marta the night before your hike, I’d recommend Hotel Boutique Casa Chunuu.

The Lost City
Lost City Trek: What To Expect
The Lost City is an all-inclusive, fully guided trek that includes lodging in camps with beds and mosquito nets, plus 3 meals a day.
It’s an out-and-back trek with about 5-7 hours of hiking per day, and it can be done in 3, 4, 5, or even 6 days. Most people do it in 4 days, and I think that’s the perfect length of time for the average person.
If you’re a very fit hiker who’s limited on time in Colombia, then the 3 day option may work for you. Otherwise, if you want to slow down and spend more time in the mountains, then 5 or 6 days may be right.
However, for most people I’d recommend 4 days. It gives you enough time to experience the sights without feeling too rushed, and it’s not too difficult for most hikers.

Mutanyi village
You’ll be waking up at 5 AM every day of the trek, and winding down activity at around 3-5 PM.
That sounds like an awful lot, but don’t worry, there will be plenty of breaks to eat, swim, and rest in between. It’s not all hiking.
There are river crossings on each day of the hike, but all of these have bridges now, which is great. You won’t have to worry about wading through the rivers like in the old days. Some travel guides on the internet were written before this changed.
In the next few sections, I’ll share my own experience on each day of the Lost City trek and what you can expect in terms of sights, activities, camps, and challenges.

There’s lots of nice scenery
Day 1: Start Of The Trek
My trek began with a 7 AM pickup from my hotel in Santa Marta. I was joined by my cousin and his wife, and we were first brought to the tour company’s office in Santa Marta, where we had a snack and met the rest of our group.
There were exactly a dozen people in our group — 10 hikers and 2 guides. Most of the hikers were from the Netherlands, plus a few Americans (us) and a German couple.
We were all herded into the back of a van together, and then drove 1 hour on the highway to the main entrance, where we stopped for a 15 minute break to stretch and pee (map here).

Entrance to the mountain road
Next, we drove 1 hour on a mountain road to the town of Machete. This part of the journey was very uncomfortable because of the cramped leg room, side facing seats, and bumpy road conditions.
We stopped for lunch at a restaurant in Machete and met our Colombian guides, who gave us a briefing on the hike and what to expect. Then it was time to start hiking!
For the first day, we only had to hike about 9 kilometers (~6 miles), which wasn’t too hard, although we ran into some heavy rain that turned the path into pure mud and sludge, causing us to slip around for the rest of the afternoon.
Finally we reached Camp Alfredo, where we ate supper and stayed the first night.

Dining room at Camp Alfredo
Day 2: Villages & Culture
The second day was one of the longest and hardest parts of the trek, although we had much better luck with the weather compared to the first day.
This time, we woke up at 5 AM for breakfast and hiked all the way from Camp Alfredo to Camp Paraiso, which took us deeper into the jungle another 14 kilometers (~8 miles).
There were lots of steep hills and it was a killer workout. Along the way, we got to see the traditional thatch hut village of Mutanyi, belonging to the Kogi indigenous people.


Mutanyi village
We also stopped for lunch at Camp Mumake and swam in the river, which was a very relaxing break from hiking. The water was surprisingly cold and that’s just what we needed.
Most of the day was spent hiking near the river, and this time, the rain held off until we reached Camp Paraiso.
The rain didn’t start up until after we went to bed, and then it was just a nice background noise as we fell asleep.

The rivers are really nice for swimming
Day 3: Exploring The Lost City
On the third day, it was time to go see the Lost City!
To reach it, you have to climb approximately 1,200 stone steps. They’re steep, oddly-shaped, wobbly, and slippery, especially in the early morning dew, so be very careful.
This would be an easy place to hurt yourself.


Hiking up the steep stone steps
The Lost City is interesting, and it’s a lot bigger than I expected. It was built by the Tairona people in 800 AD, so it’s older than Machu Picchu in Peru.
It takes hours to explore the main ruins and terraces, so we were surprised when our guide told us that there are even more ruins that aren’t open to the public!
What we see as tourists is only a fraction of the Lost City, but it’s still impressive.
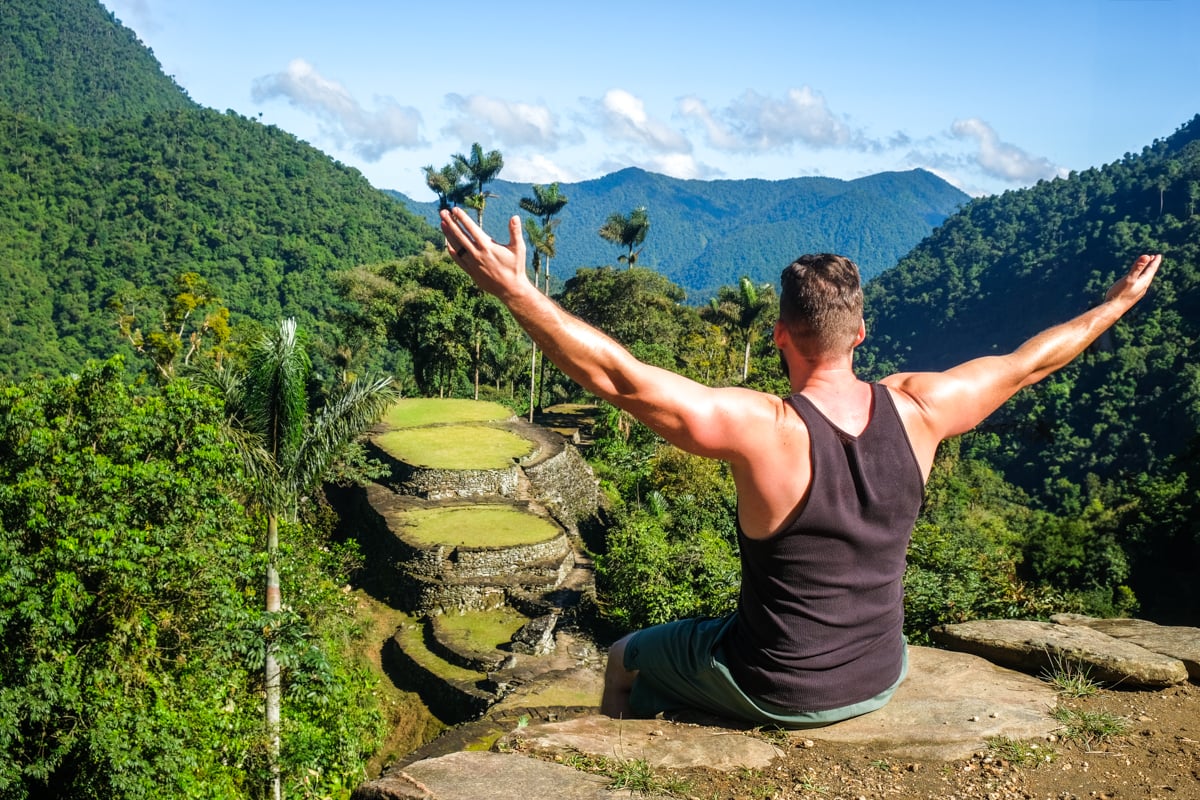
The best view can be found at the top of the city, looking down on the terraces and the mountains in all directions.

The Lost City!
After a thorough tour with lots of explanations from our guide and plenty of time to take photos, it was time to start hiking back.
We went down to Camp Paraiso and grabbed lunch, swam in the river a little more, and then hiked all the way back to Camp Mumake, where we stayed the last night of the trek.


Day 4: The Return Journey
The last day of the trek was another whopper. We woke up at 5 AM again, and hiked about 16 kilometers (~10 miles) back to the start.
On the way back, the sky was clear and we got some wonderful views of the Sierra Nevada mountains, which we had missed on the first day because of the rain. Bright green mountains!
We had our last lunch together in Machete town, and then headed back to Santa Marta to get cleaned up.
All in all, the Lost City was a great hike and everyone in our group enjoyed it immensely.

Bright green mountains
Map Of The Trail
Here’s a map from AllTrails that shows the hiking route and elevation profile.
The camps are also marked, although not in the same order we used. Alfredo is marked here as camp 1, Mumake is camp 2, and Paraiso is camp 3.
How Hard Is It?
The Lost City is a hard hike. It’s definitely tougher than I expected.
You’ll be walking up and down steep hills every day with rocky and muddy terrain, plus the crazy humidity. Your sleep quality won’t be the greatest either, thanks to the early wakeup times every morning.
All of this is compounded by the 4-day length of the hike. We were fresh on the first day or two of the hike, but by the end we were exhausted and pretty beat up.
That doesn’t mean the trek is unmanageable, or that you need to be super fit to do it. The guides are very patient waiting for stragglers, and they give plenty of snack breaks and rest stops along the way.
So yes, you can do the trek. Don’t worry. Just expect plenty of challenge!

All of the river crossings have bridges now
What Are The Camps Like?
I’m happy to say the camps on this trek are fairly comfortable, although you can’t expect luxury.
There are showers, flush toilets, and clotheslines, and the bunk beds have nets to keep you safe from mosquitoes at night.
All of the camps have charging stations and WiFi, although you may need to pay a small cash fee to use it. Other than that, you won’t have cell phone service anywhere on the trail, including the camps.
Electricity is turned off at around 9 PM every night, so take care of your charging and necessities before then.
Each camp also has a little shop where you can buy snacks, drinks, and toiletries. They had a surprising assortment of goodies for sale: shampoo, tooth paste, toilet paper, tampons, cigarettes, beer, Gatorade, batteries, and more.
It actually had me wishing I’d packed less stuff!

Beds in the camp

Drying our clothes
Is It Safe?
While some places in Colombia are definitely sketchy in terms of crime, the Lost City has had a good safety record for many years now.
Long story short, it’s generally a safe hike and the main risk is twisting an ankle or something of that sort.
However, if you’re interested in knowing more, I wrote a detailed article on this subject, which you can read in the link below.
Read More: Safety On The Lost City Trek

Welcome to the jungle
Food Safety
The situation with food and water safety has improved a lot, but unfortunately some people still report getting sick on the Lost City trek.
The staff do a pretty good job with hygiene and meal preparation, but it’s hard to keep things perfectly clean and safe when you’re working in a remote jungle camp.
We talked to another hiker on the trail and they said three members of their group got very sick (with diarrhea and throwing up), and had to be carried out on mules.
Thankfully that didn’t happen to anyone in our group, but if you want to be extra safe, there are lots of places to buy bottled drinking water along the trail, or you can bring your own water purification tablets.
To be fair, all the food we ate was great, and there was filtered drinking water available at every camp where we stayed.
We had no issues with sickness on our trek, but the possibility remains.


Can You Hike Independently?
No, you can’t do the Lost City trek on your own. A guide is strictly required for anyone who wants to do the hike.
Yes, it’s expensive, but the tours bring money into the local community and keep it sustainable. Money keeps the trails open, the camps comfortable, and many other things.
It also helps the hard working Colombian trekking guides, who do a lot to make this hike safe and enjoyable for everyone.

Thick jungle
What To Bring
- Backpack. My bag had approximately 30 liters of space and that was enough.
- Spare Clothes. I struggled with how many spare changes to bring, because my bag was very limited on space but I also didn’t want to stink too much. Based on my experience, I think I’d recommend bringing at least 4 shirts, 2 socks, 4 pairs of underwear, and 2 pairs of shorts. You’ll want to keep one change of clothes clean and separate from the others for sleeping in.
- Outerwear. Personally, I don’t think there’s any need to bring a jacket or hoodie for this hike, but if you do, bring something very light. I regret bringing my hoodie and pants. They took up weight and space, and I never used them on the whole hike, even at night.
- Swimsuit. You’ll want this for swimming in the rivers along the trail. It’s a great way to relax and cool down.
- Plastic Bags. These are essential for keeping wet clothes separate from dry clothes, and dirty separate from clean. I brought 5 plastic bags, and it would’ve been nice to have even more.
- Toiletries. Things like soap, deodorant, a toothbrush and toothpaste.
- Sun Protection. You’ll want a hat and sunscreen, especially for the first day of the hike. There’s no shade at all and you’ll get roasted. After the first day, you’ll spend more time hiking under jungle cover but there are still some spots where you’ll want sun protection.
- Bug Spray. Keeps you safe from mosquitoes in the jungle and at the camps.
- Ear Plugs. These could be handy if you’re sensitive to other campers snoring.
- Waterproof Cover. I don’t think a fully waterproof bag is needed for this hike because you won’t be wading through rapids or anything, but you should at least have a waterproof cover like this one to protect your bag from the rain.
- Tissues. These can be helpful but they aren’t completely necessary. Most of the bathrooms in the camps have toilet paper, and if it runs out, you can easily buy more at the little supply shop in the camp.
- Light. Even though you won’t be hiking in the dark, a small light is handy in case you need to do anything in the camp after dark.
- Water Tablets. All of the camps have a filter for their water, but I didn’t completely trust it. If you want to be extra safe, you can bring water purification tablets. That’s what I did. They’re very small and easy to carry.
- Cash. It’s good to have a little bit of cash if you plan to buy snacks, drinks, WiFi, or anything else at the camps.
- Footwear. You’ll want good hiking boots for the trail, but having a pair of sandals is also very handy for walking around at the camps every day and going to the river to swim.

The Lost City
Best Time To Go
The best time to do the Lost City trek is during the dry season, from December to April. You can see a graph of Santa Marta’s weather pattern here.
It’s still possible to do the hike during the wetter months from May to August, or October to November, but you have a higher chance of running into rain. The trail is completely closed every year for the month of September.
I went in mid-December and the weather was decent. There was heavy rain every night, and one big downpour on the first day that lasted quite awhile, soaking our gear and causing us to slip around in the mud for hours, so that wasn’t ideal.
The humidity on this hike is crazy, so if any of your clothes get wet, they are never going to dry again unless they sit in direct sun for awhile. Seriously!
Hiking while soggy wet is no fun at all, so if I went to the Lost City again, I think I’d do it sometime between January and March. That’s your safest bet.
More Travel Guides
Thanks for looking! I hope you enjoyed this blog about how to do the Lost City trek in Colombia.
Don’t forget to check out my other travel guides for South America before you go!

